With the release of Next.js 13, Next.js officially supports React server components, and here's everything you need to know about server components so you can start building better, faster apps right away.
👨🏻💻 Here's What You'll Learn
- What are server components
- The difference between server and client components
- When to use a client or server component
- Best practices for nesting server and client components
- How to use React Context with server components
📺 Video Tutorial
If you prefer to watch a video tutorial instead, here you go! 👇
If not, you can skip this section and continue reading the article below.
What are Server Components?
Let's start with what server components are?
With server components, the initial HTML is rendered on the server.
This means the initial page load is faster and the client-side JavaScript bundle size is reduced.
This is possible because we can fetch data in a server instead of in the browser, use servers that are closer to our database, and keep large dependencies server-side.
With Next.js, all components within the app router are server components by default, including all special files and components in the app directory.
For example, if we create a components folder inside the app directory, every component will be a server component.
Let's try this! Create a components folder inside the app directory and add a new component named ServerComponent.js.
const ServerComponent = async () => {
  return (
    <div>
      <h1>Server Component</h1>
    </div>
  );
};

export default ServerComponent;
As I said, server components are great for fetching data because it reduces the amount of work the client has to do. So let's fetch some dummy data from an API.
// Fetch dummy data
const getData = async () => {
  const res = await fetch('https://dummyjson.com/products');
  return res.json();
};

const ServerComponent = async () => {
  const data = await getData();
  console.log(data);

  return (
    <div>
      <h1>Server Component</h1>
    </div>
  );
};

export default ServerComponent;
Create a new getData function that gets some dummy data from the dummyjson API.
Then we can call this function inside our server component and log the data to the console. Import the component into our home page.
import ServerComponent from './components/ServerComponent';

const HomePage = () => {
  return (
    <div>
      <ServerComponent />
    </div>
  );
};

export default HomePage;
If we open a local server and then open the developer console, we can see that the data is not logged in the console.
But if we look at our local server, the data is being printed.
This means that the data was successfully fetched on the server side, because logging the data to the console would be on the client side.
By default, all the components inside the App Router are server components with no extra work. Getting data from the server is great for performance, but what if we want to add interactivity to our app?
We need to make our server component a client component. Otherwise it will throw an error.
We can test this by importing useState into our server component. If we open a local server and navigate to the index page, we'll see that Next.js throws an error saying that we can't use hooks inside a server component.
This is because hooks are only available in client components.
How to use Client Components?
Fortunately, it is very easy to create a client component. Let's create a new component called ClientComponent.js that displays a simple counter.
import { useState } from 'react';

const ClientComponent = () => {
  const [count, setCount] = useState(0);

  return (
    <div>
      <p>You clicked {count} times</p>
      <button onClick={() => setCount(count + 1)}>Click me</button>
    </div>
  );
};

export default ClientComponent;
We use the useState hook to create a counter that increments every time we click on the button.
We display the count and the button in our return statement. Then we import the component into our home page.
import ClientComponent from './components/ClientComponent';
import ServerComponent from './components/ServerComponent';

const HomePage = () => {
  return (
    <div>
      <ClientComponent />
      <ServerComponent />
    </div>
  );
};

export default HomePage;
When we try to run this code, you will notice that it displays an error. This is because our ClientComponent is currently being rendered on the server. To make this a client component, we need to use the 'use client' directive.
Add 'use client' at the top of the file. It must come before any imports.
'use client';

import { useState } from 'react';

const ClientComponent = () => {
  const [count, setCount] = useState(0);

  return (
    <div>
      <p>You clicked {count} times</p>
      <button onClick={() => setCount(count + 1)}>Click me</button>
    </div>
  );
};

export default ClientComponent;
If we try to run this code now, we'll see that it works. We can now use hooks in our client component and add interactivity to our app.
When to use Server and Client Components?
Using client components is as simple as adding a line, but this begs the question, when do you use server components and when do you use client components?
The official documentation has a great table showing when to use which.
Server Components
- Fetch data
- Access backend resources (directly) like databases
- Keep sensitive information on the server (access tokens, API keys, etc)
- Keep large dependencies on the server / Reduce client-side JavaScript
Use server components when you need to fetch data, access back-end resources such as databases, or when you need to keep sensitive information on the server.
For example, API keys or access tokens. If your application has large dependencies, you can also use server components to reduce the size of the client-side JavaScript bundle.
Client Components
- Add interactivity and event listeners (onClick(), onChange(), etc)
- Use State and Lifecycle Effects (useState(), useReducer(), useEffect(), etc)
- Use browser-only APIs like localStorage
- Use custom hooks that depend on state, effects, or browser-only APIs
- Use React Class components
On the other hand, client components make more sense if you need to interactive UI.
If you rely on states and lifecycle effects, use browser-only APIs like localStorage or the Clipboard API, have custom hooks that depend on state, effects, or browser-only APIs, or if you use React class components.
It's important to understand that we don't need "use client" in every file. It only needs to be defined once at the top of the tree, since any module imported into it will be considered a client component.
Server components are guaranteed to render only on the server. Client components are primarily rendered on the client, but with Next.js they can also be pre-rendered on the server and hydrated on the client.
Next.js does this for us behind the scenes, because we can also nest server components within client components, which can lead to unexpected behavior.
To avoid this, it's important to know the best practices for using server and client components.
Best Practices
The first best practice is to move client components to the leaves of your component tree whenever possible.
For example, you may have a page that has static elements such as a logo, links, images etc., but also interactive UI like a search bar that uses state.
Instead of making the whole page a client component, move the interactive logic such as a "search bar" to a client component and keep the rest as server components.
import ClientComponent from './components/ClientComponent';
import ServerComponent from './components/ServerComponent';

const HomePage = () => {
  return (
    <div>
      <ClientComponent />
      <ServerComponent />
    </div>
  );
};

export default HomePage;
If we import our ServerComponent and ClientComponent into our home page, we can see that the ServerComponent is rendered on the server and the ClientComponent is rendered on the client.
If we click on the counter, it increments, but the API data is not printed in the console. This means the server component is still fetching the data server-side.
But what if we want to mix them? How do we mix server and client components?
One important thing to remember is that we can't import a server component into a client component. This is because it would require an additional server roundtrip.
Let's test this out by importing our ServerComponent.js into our ClientComponent.js file.
'use client';

import { useState } from 'react';
import ServerComponent from './ServerComponent';

const ClientComponent = () => {
  const [count, setCount] = useState(0);

  return (
    <div>
      <p>You clicked {count} times</p>
      <button onClick={() => setCount(count + 1)}>Click me</button>

      <ServerComponent />
    </div>
  );
};

export default ClientComponent;
As you can see, when we try to click on the counter, it doesn't work anymore. Next.js doesn't allow us to import server components into client components.
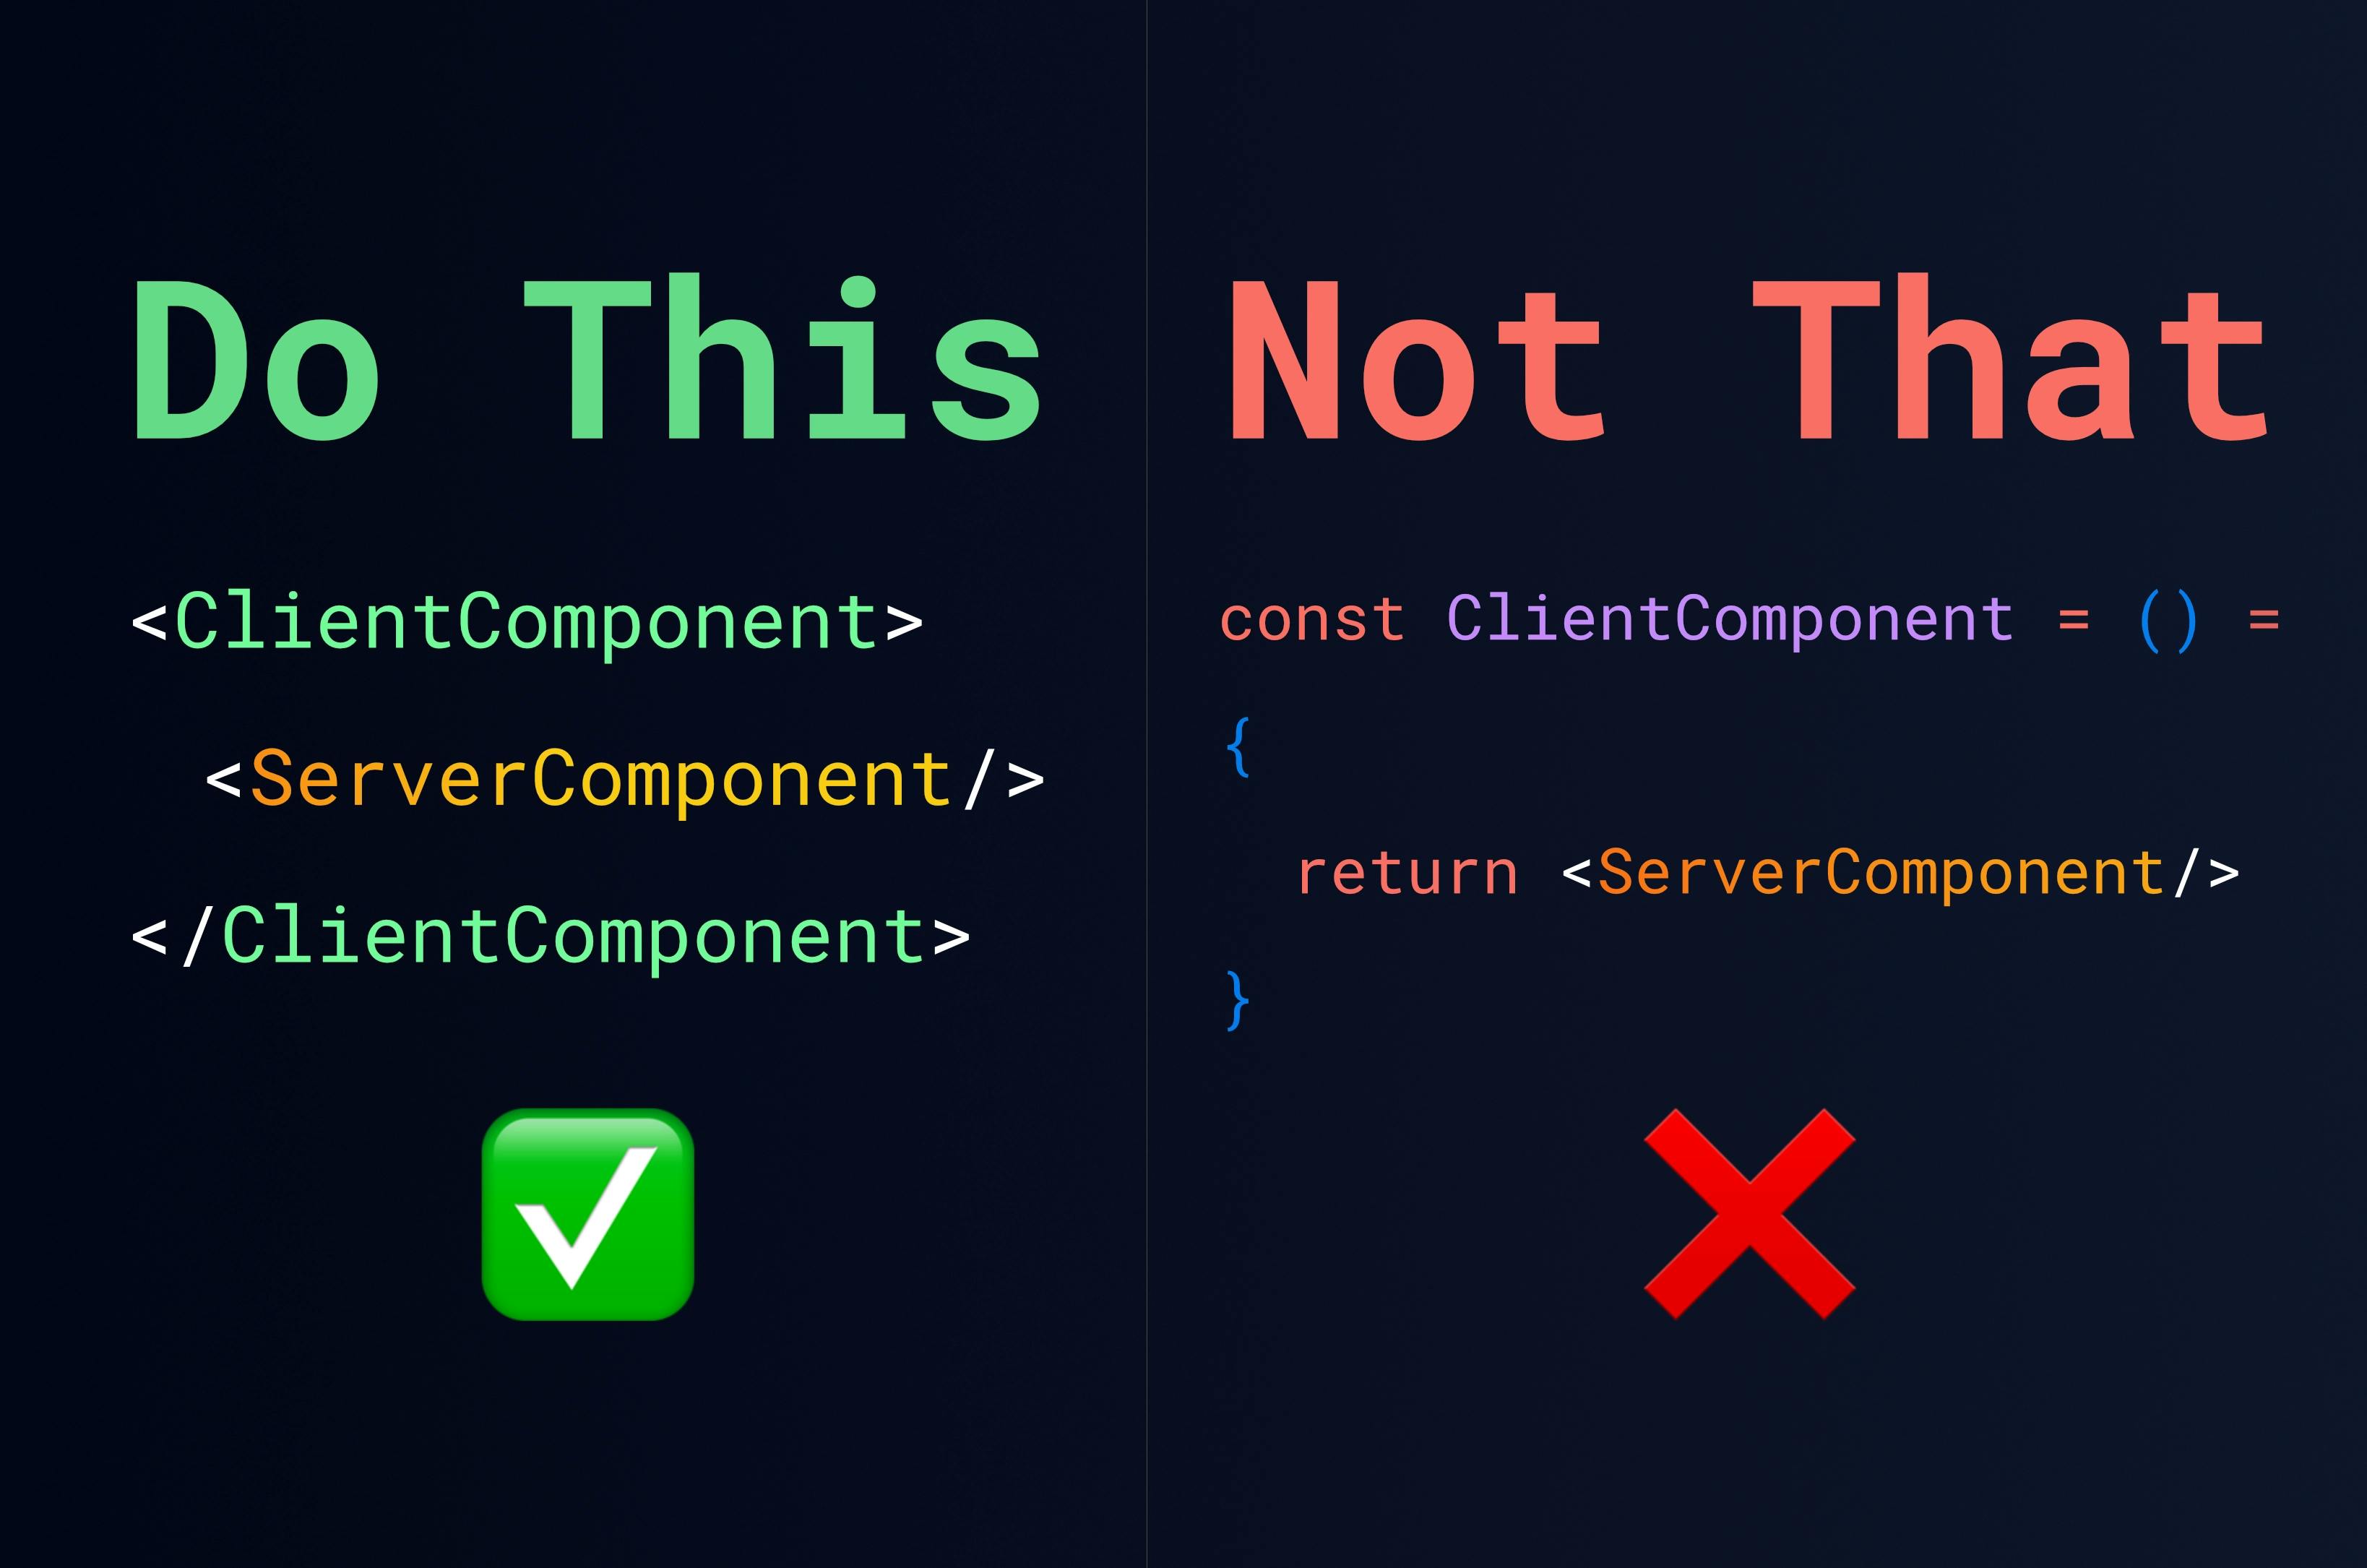
Composing Server and Client Components
The recommended way is to pass server components to client components as props. Let's modify our client component.
'use client';

import { useState } from 'react';

const ClientComponent = ({ children }) => {
  const [count, setCount] = useState(0);

  return (
    <div>
      <p>You clicked {count} times</p>
      <button onClick={() => setCount(count + 1)}>Click me</button>

      <div>{children}</div>
    </div>
  );
};

export default ClientComponent;
We add a new prop called children and render it inside a div. Then move our ServerComponent.js into our ClientComponent.js inside our page.js file.
import ClientComponent from '@/app/components/ClientComponent';
import ServerComponent from './components/ServerComponent';

const HomePage = () => {
  return (
    <div>
      <ClientComponent>
        <ServerComponent />
      </ClientComponent>
    </div>
  );
};

export default HomePage;
If we go back to our browser and click on the counter, we'll see that it's working again.
If we open the console, we don't see the data being logged any more, but if we look in our local server, the data is still being printed.
With this approach, our components are decoupled and can be rendered independently.
Our server component is rendered on the server before our client component is rendered on the client, even though they are nested.
This is the recommended way to compose server and client components.
This is actually very React, because passing JSX components to other components is nothing new and has always been a part of the React environment.
Using React Context
This comes in handy when we want to use React Context. Most of the time, we use React Context to share data between our components.
React Context only works with client components, so we can't use it with server components.
But we can pass server components to client components as props, and use React Context inside our client components.
Let's try this out by moving our counter state to a new context.
Create a new folder called context inside our app directory and create a new file called CounterContext.js.
Make sure, it's a client component by adding 'use client' at the top of the file.
'use client';

import { createContext, useState } from 'react';

export const CounterContext = createContext();

export const CounterProvider = ({ children }) => {
  const [count, setCount] = useState(0);

  return (
    <CounterContext.Provider value={{ count, setCount }}>
      {children}
    </CounterContext.Provider>
  );
};
We create a new context called CounterContext and a new provider called CounterProvider.
We use the useState hook to create a counter that increments each time the button is clicked.
We then create a new provider that passes the counter state to our context.
Let's wrap our layout.js file with our new CounterProvider.
import './globals.css';
import { Inter } from 'next/font/google';

const inter = Inter({ subsets: ['latin'] });

import { CounterProvider } from './context/CounterContext';

export const metadata = {
  title: 'Create Next App',
  description: 'Generated by create next app',
};

export default function RootLayout({ children }) {
  return (
    <html lang="en">
      <body className={inter.className}>
        <CounterProvider>{children}</CounterProvider>
      </body>
    </html>
  );
}
We want to wrap only {children} with our CounterProvider instead of the entire <html> document, because this makes it easier for Next.js to optimize our app.
We can now modify our ClientComponent.js file to use our new CounterContext.
'use client';

import { useContext } from 'react';
import { CounterContext } from '../context/CounterContext';

const ClientComponent = ({ children }) => {
  const { count, setCount } = useContext(CounterContext);

  return (
    <div>
      <p>You clicked {count} times</p>
      <button onClick={() => setCount(count + 1)}>Click me</button>

      <div>{children}</div>
    </div>
  );
};

export default ClientComponent;
Import the CounterContext and the useCounter hook. Replace the useState hook with the context.
Now, if we go back to our browser and click on the counter, we'll see that it's working again.
With the CounterContext rendered at the root, all other client components throughout your application will be able to use this context.
But all other components that are not client components will stay server components and be pre-rendered on the server.
Conclusion
And that's basically how you use server and client components in Next.js.
By now, you should have a pretty good idea of when you need to use server and client components in your React app.